How to create a HTML button
The HTML button feature offers a simple way for code distributors to serve exclusive unique codes on any webpage. This functionality is especially useful when running online campaigns with influencers, internal staff offers, or any affiliate partners who are not already API integrated with Uniqodo. Follow the instructions below to create a HTML button, which can be used to support your promotional activity.
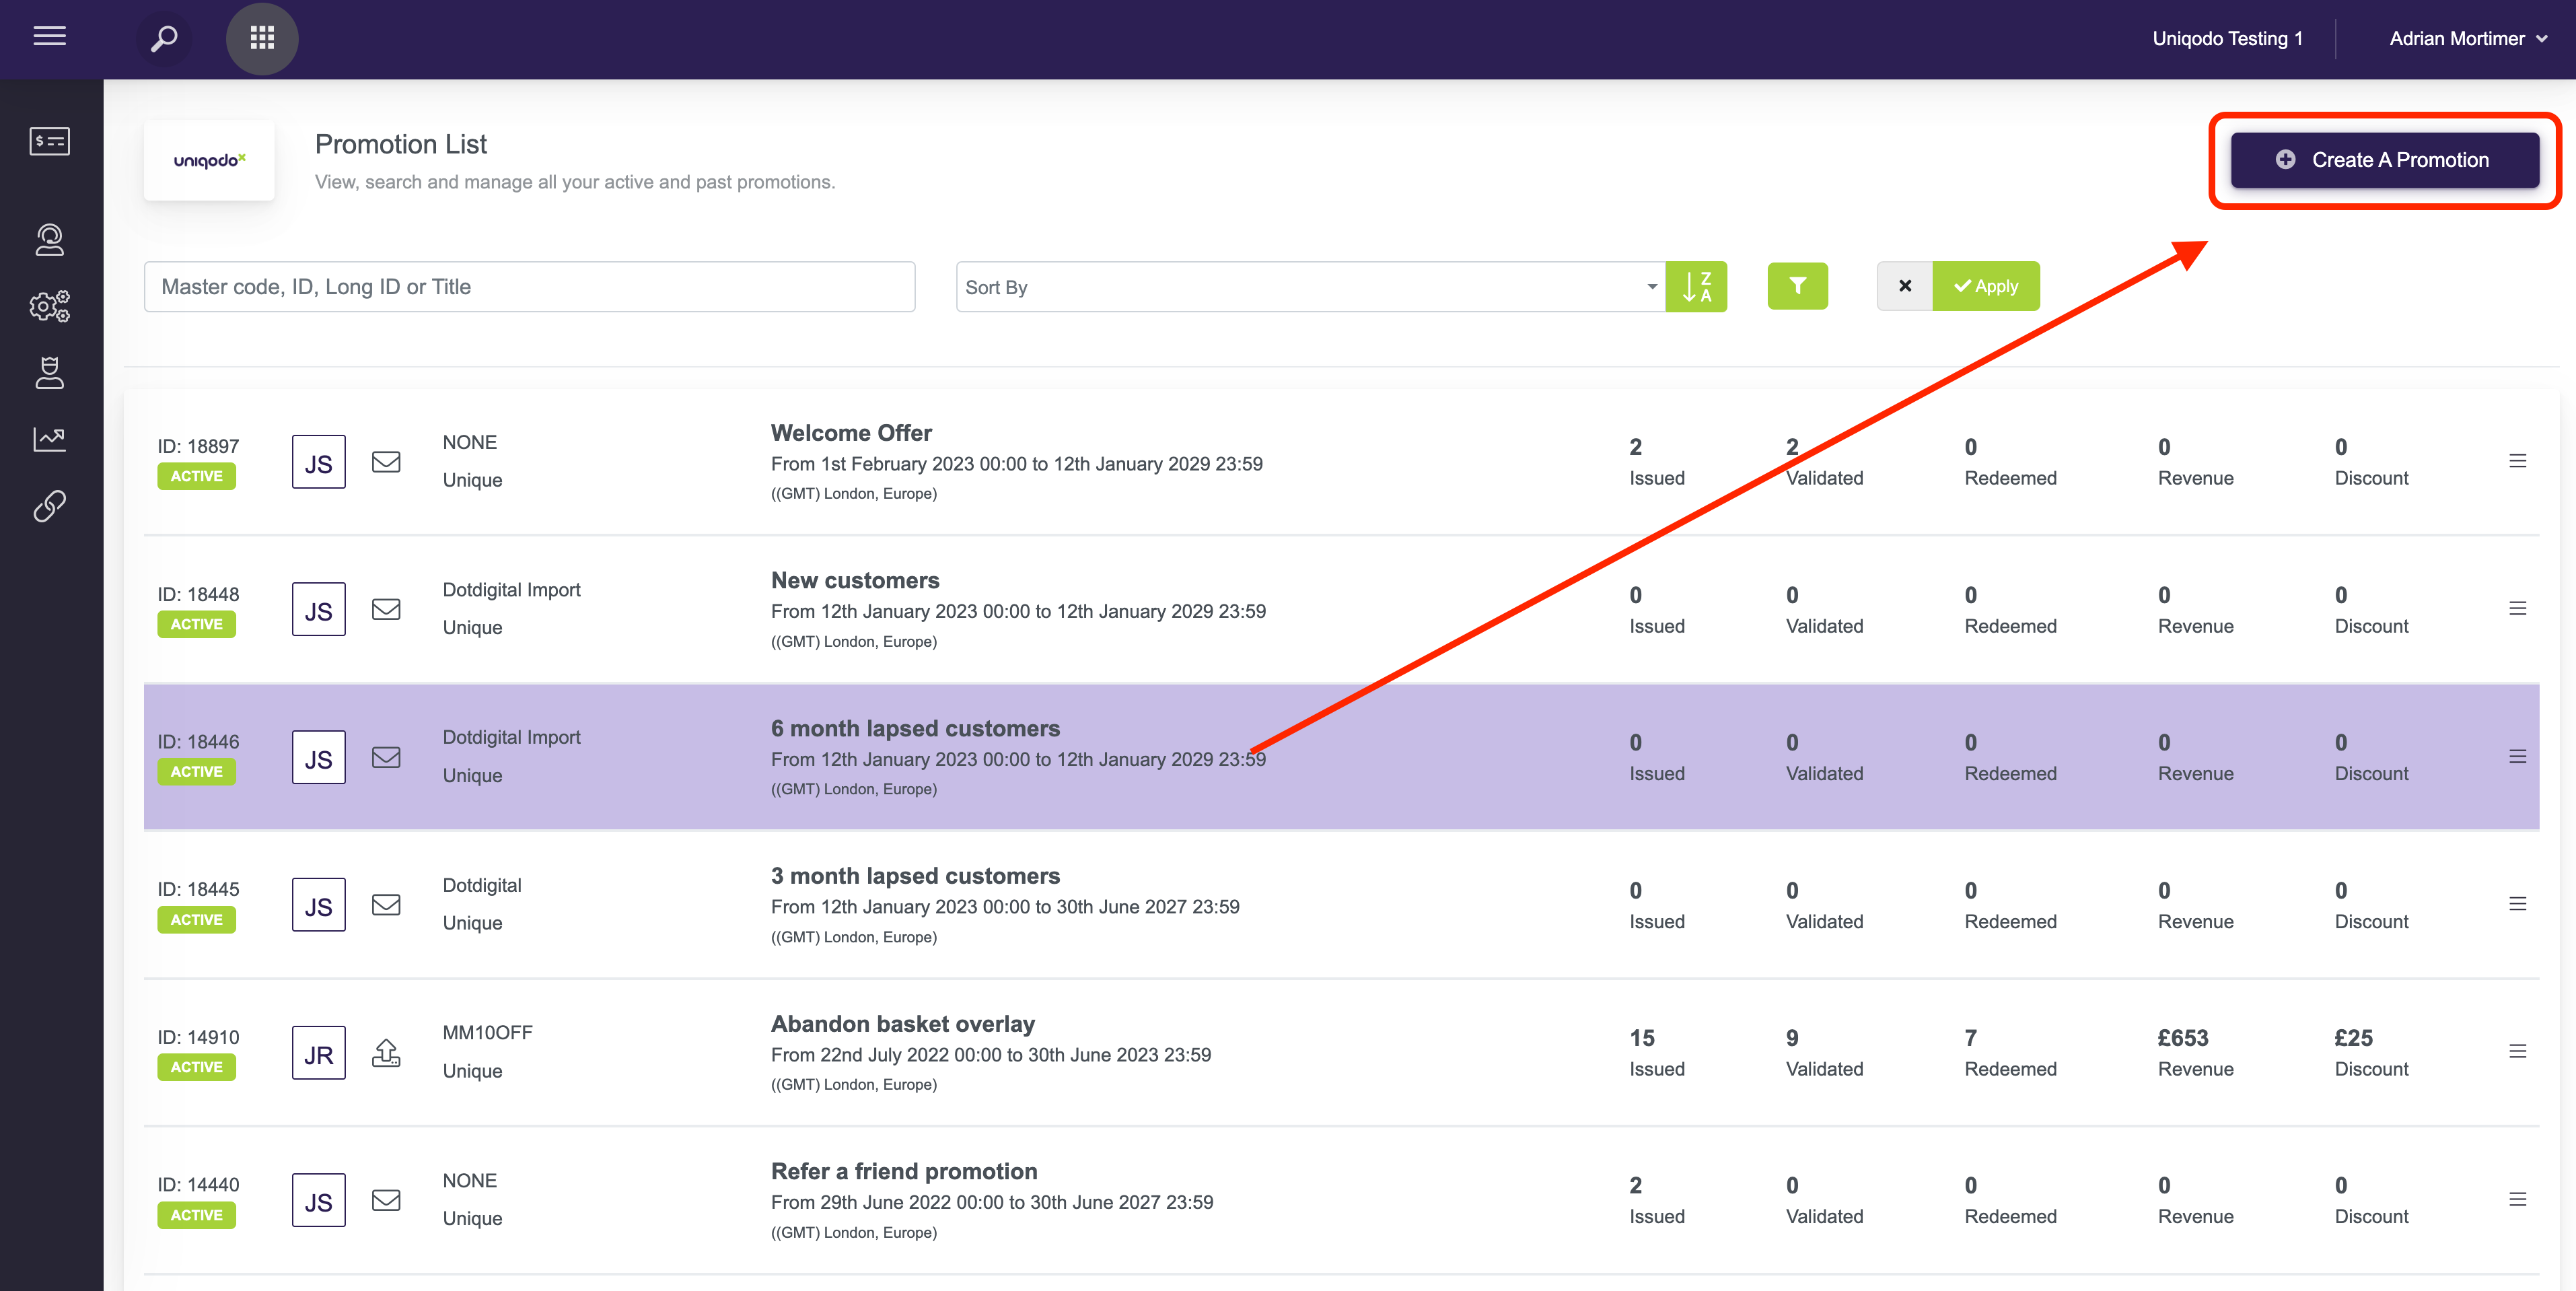
- Access your merchant dashboard at: https://your.uniqodo.com/, and click “Create A Promotion”. Then fill in the main settings and details of your promotion (Step 1).
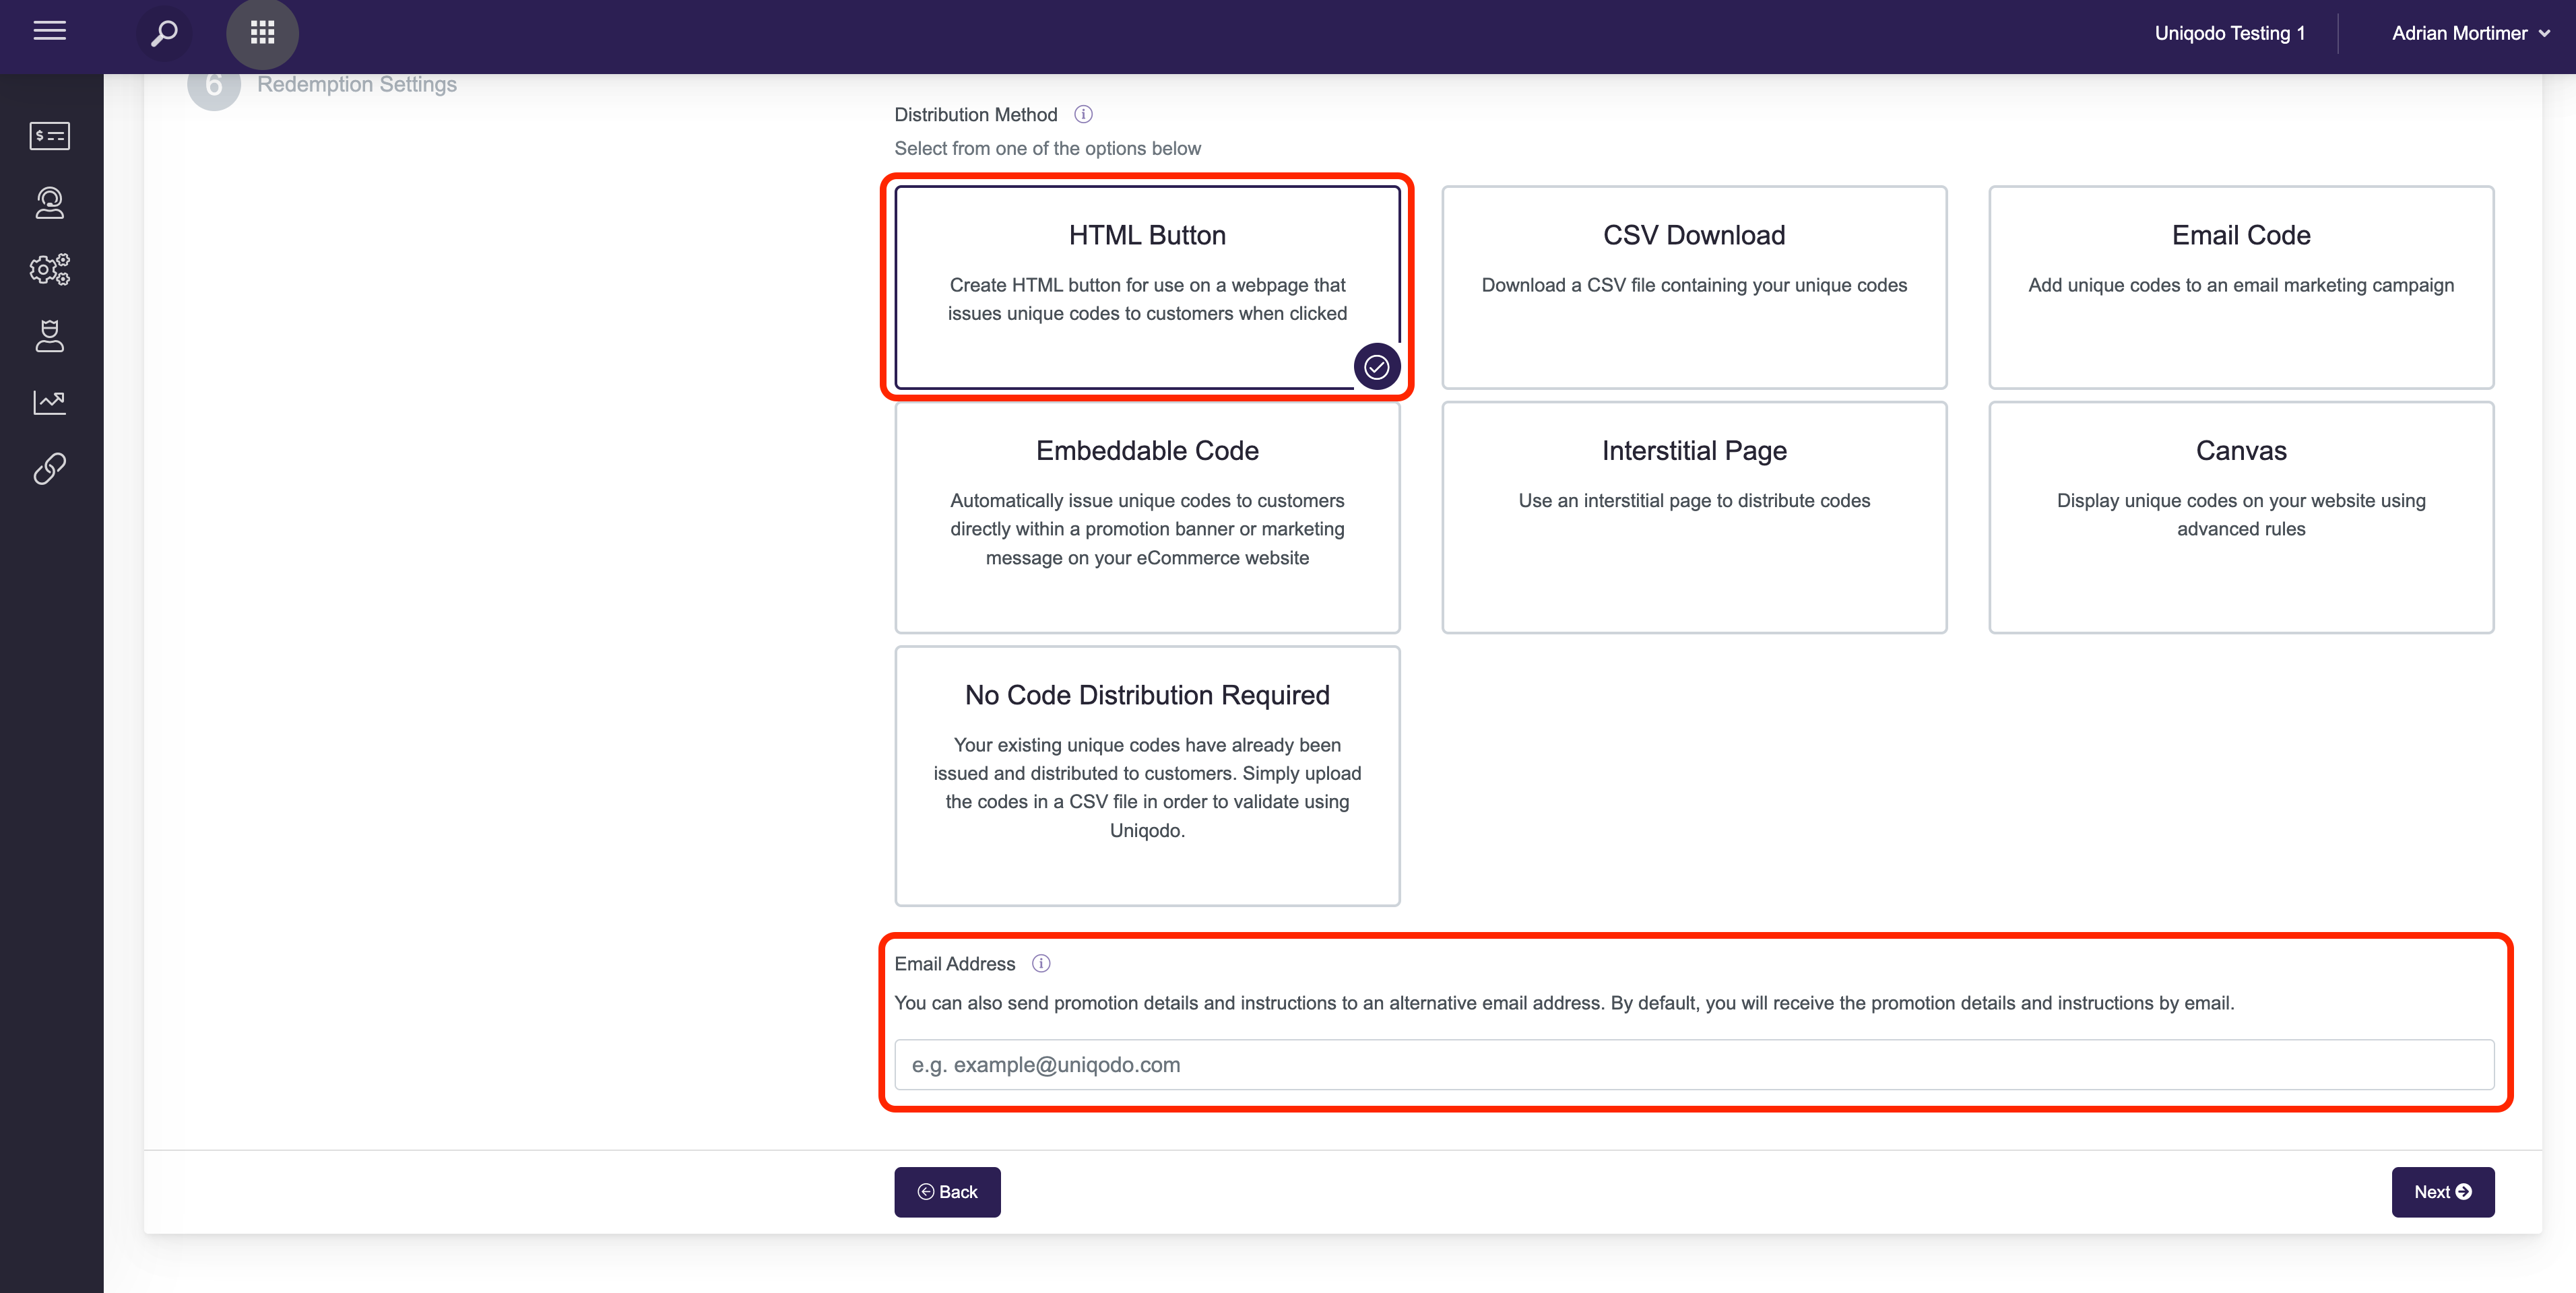
- Select the HTML Button distribution method (Step 2) and populate the bottom field with an email address to receive instructions on how to set up the HTML button feature, having completed the promotion setup for this offer. As the promotion creator, you should automatically be sent the button HTML without inputting your own email address here.
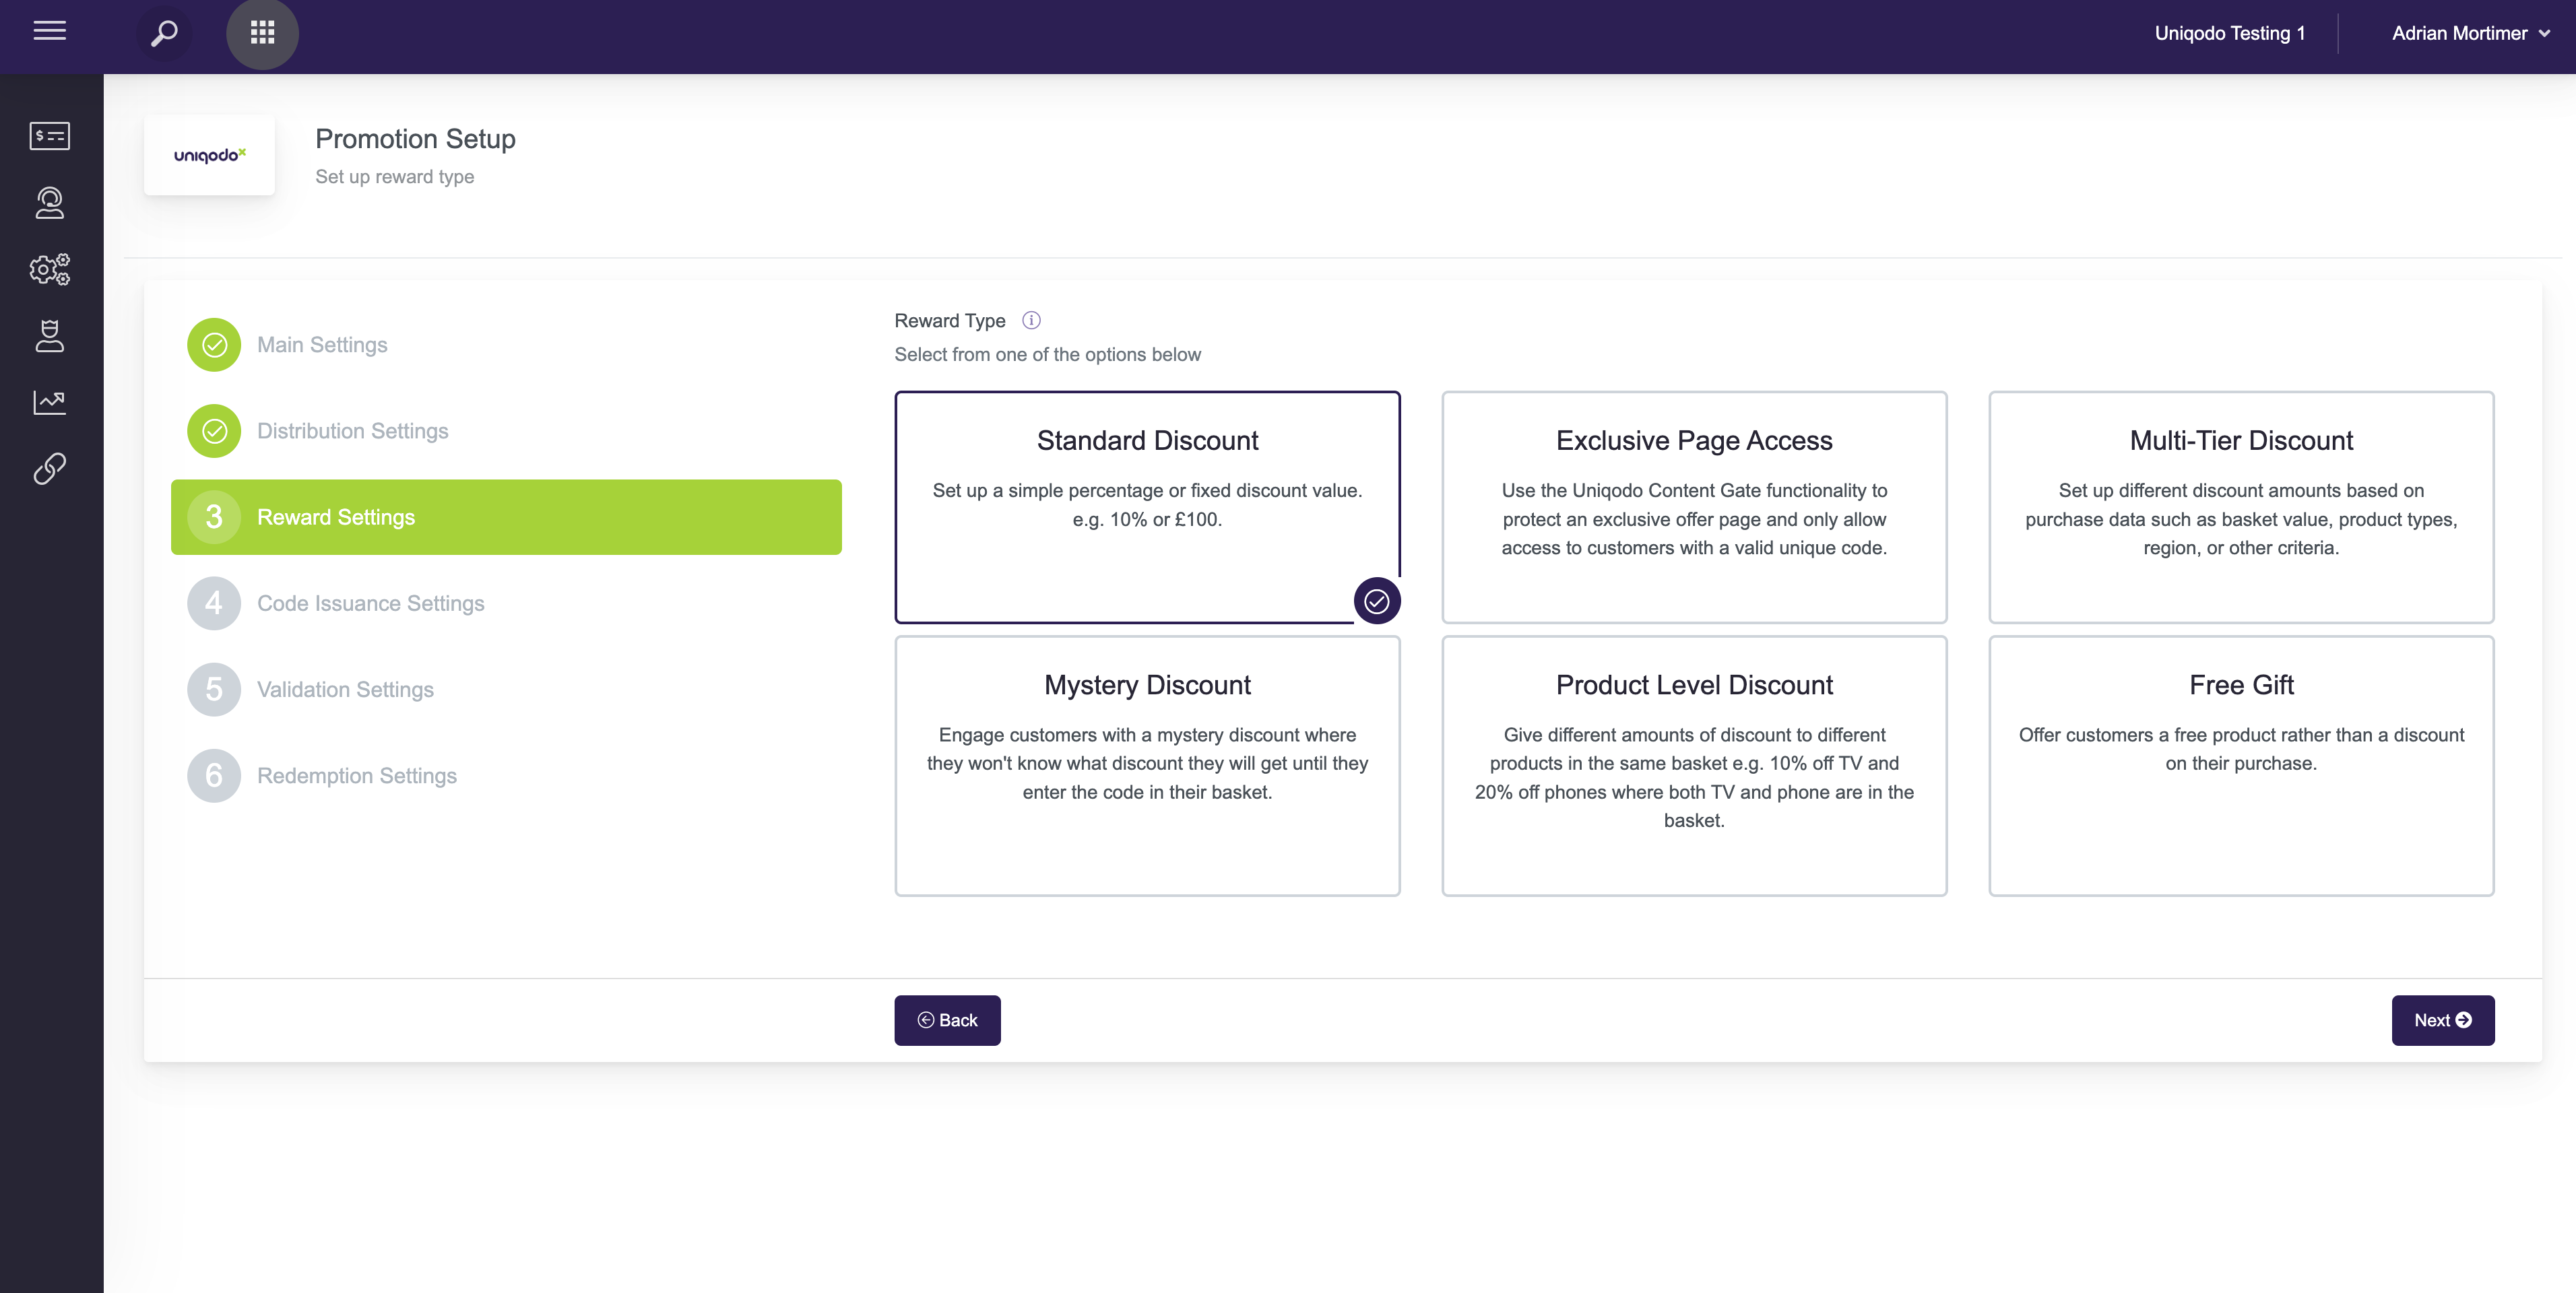
- Select the offer reward type (Step 3) and set the discount value/type for this offer within this step.
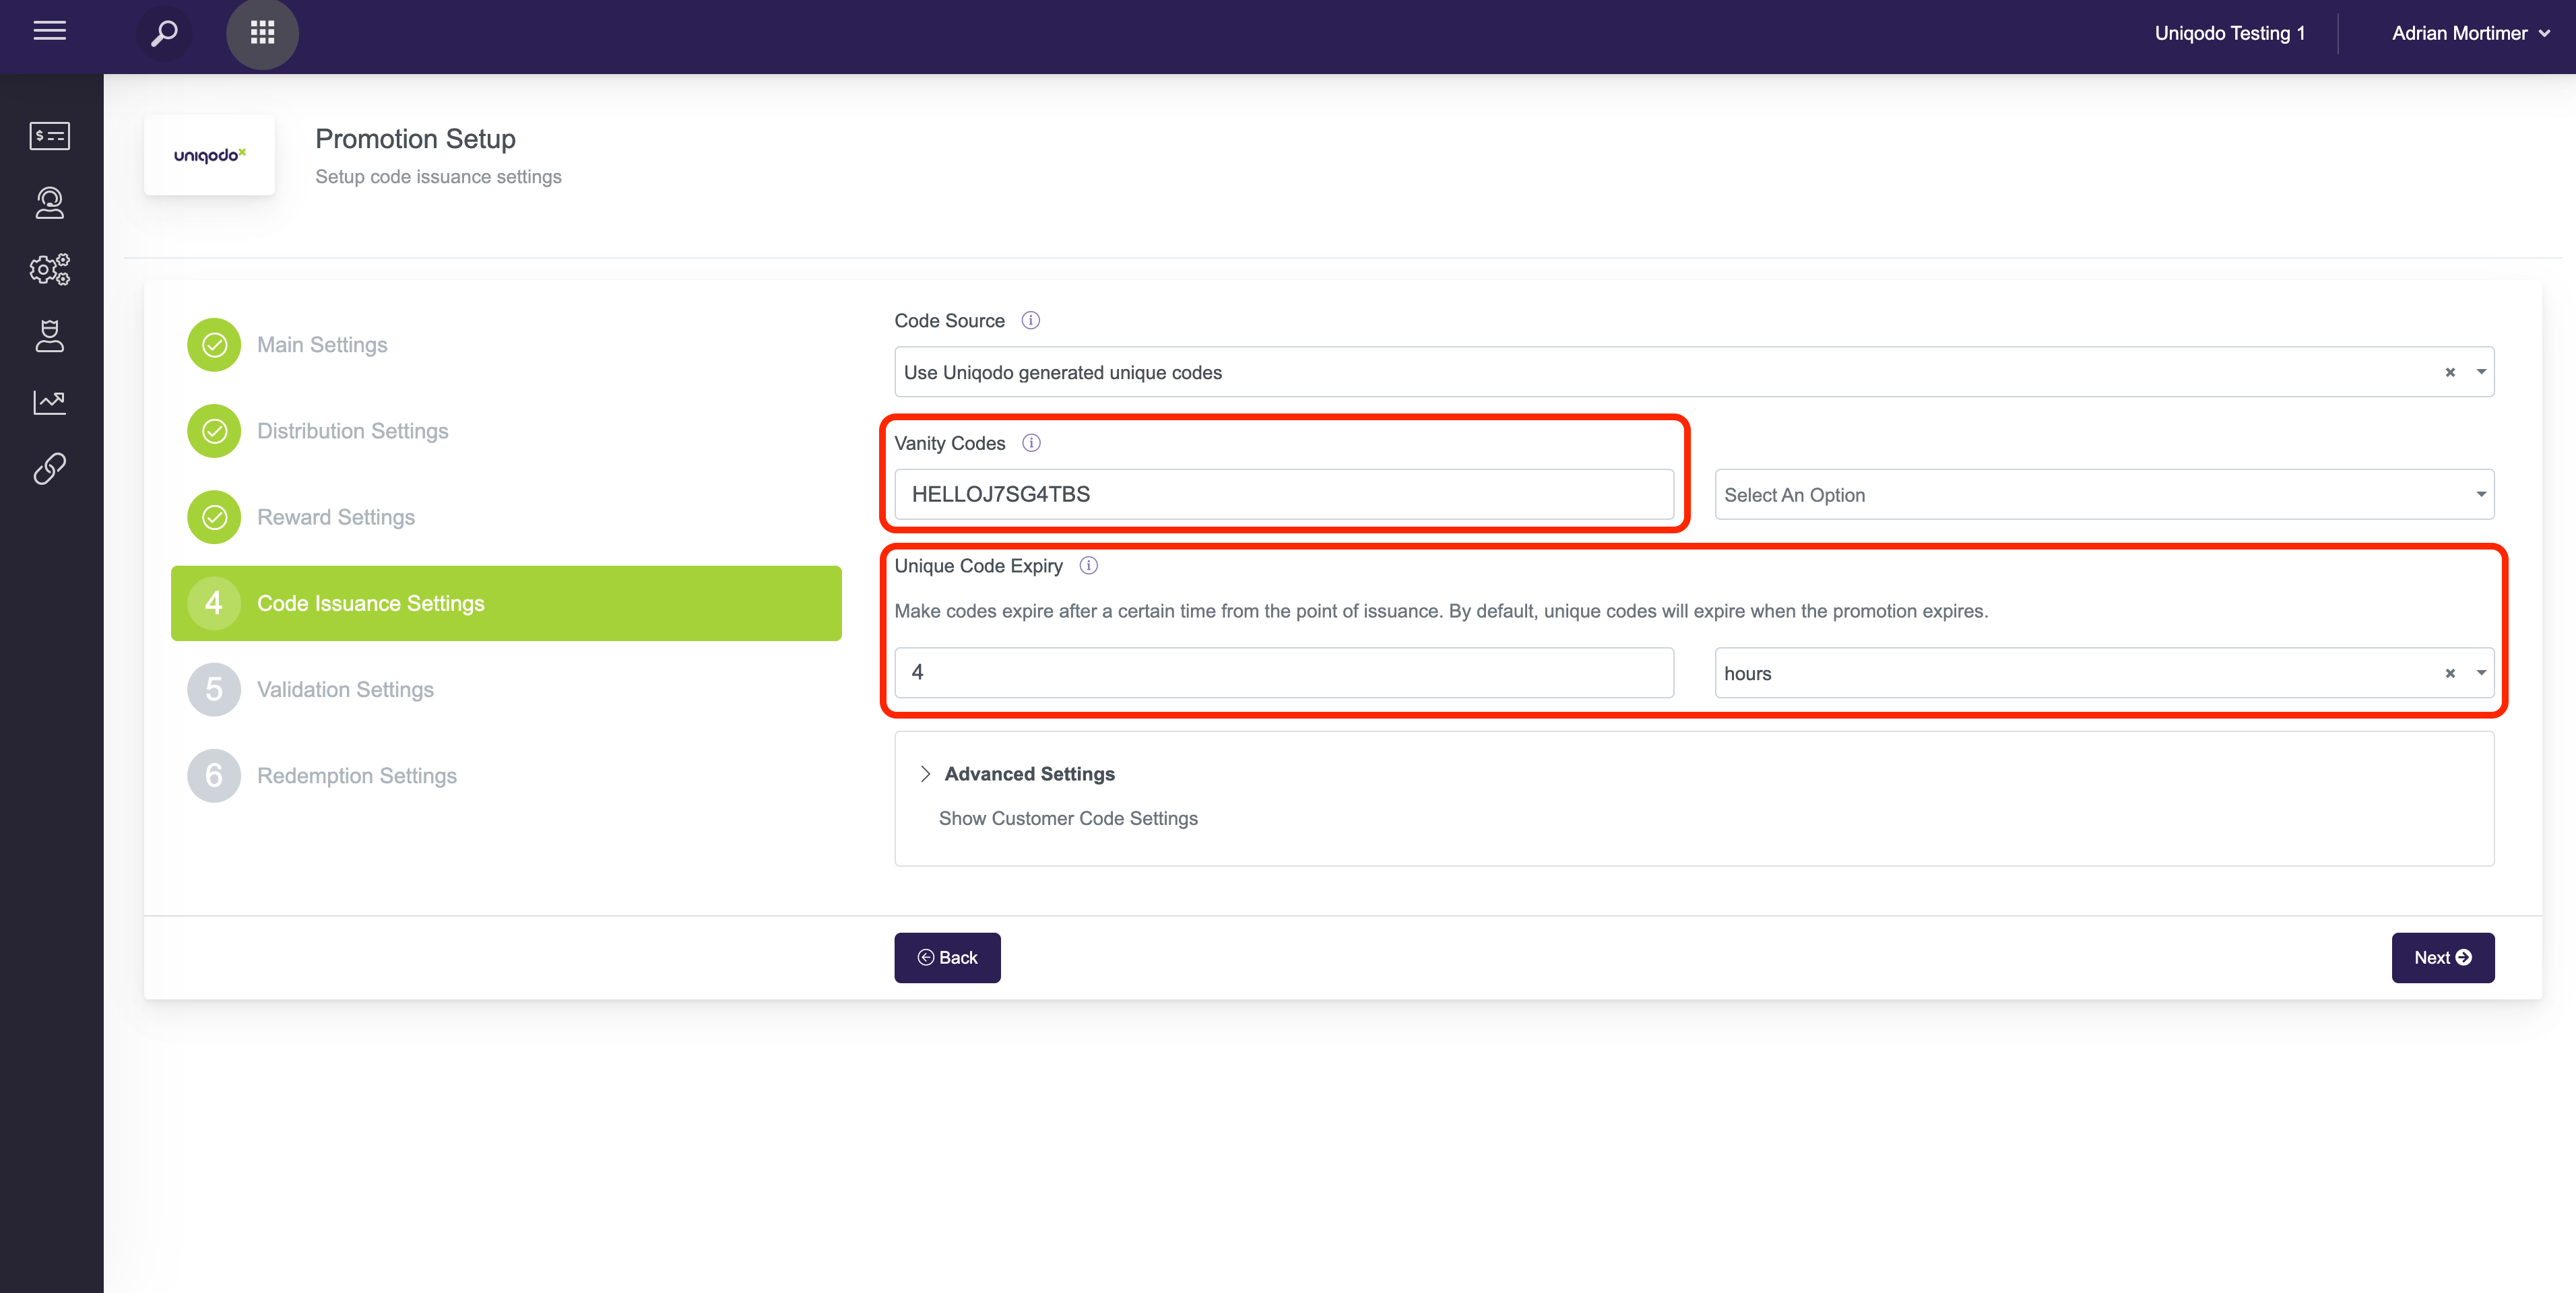
- Set the Code Issuance Settings for this offer (Step 4). Here you can apply the Vanity Code feature to append/prepend the unique codes from this offer with any characters of your choice e.g HELLOJ7SG4TBS. If you would like a unique code to expire within for example 4 hours after being served via the embeddable snippet, you can set the custom unique code expiry to 4 hours.
- (Step 5 - If applicable for the offer) You can set custom validation rules with error messaging to determine the eligibility of a unique code based on any basket level requirements e.g £100 minimum spend value.
- (Step 6) Set any unique code redemption limits which you’d like to be applied to this offer (leave these fields blank to make these codes single-use and to set no limit on the overall redemption count for this offer).
- Click ‘Next’ to review your promotion details , and create the promotion once you’re satisfied with the setup.
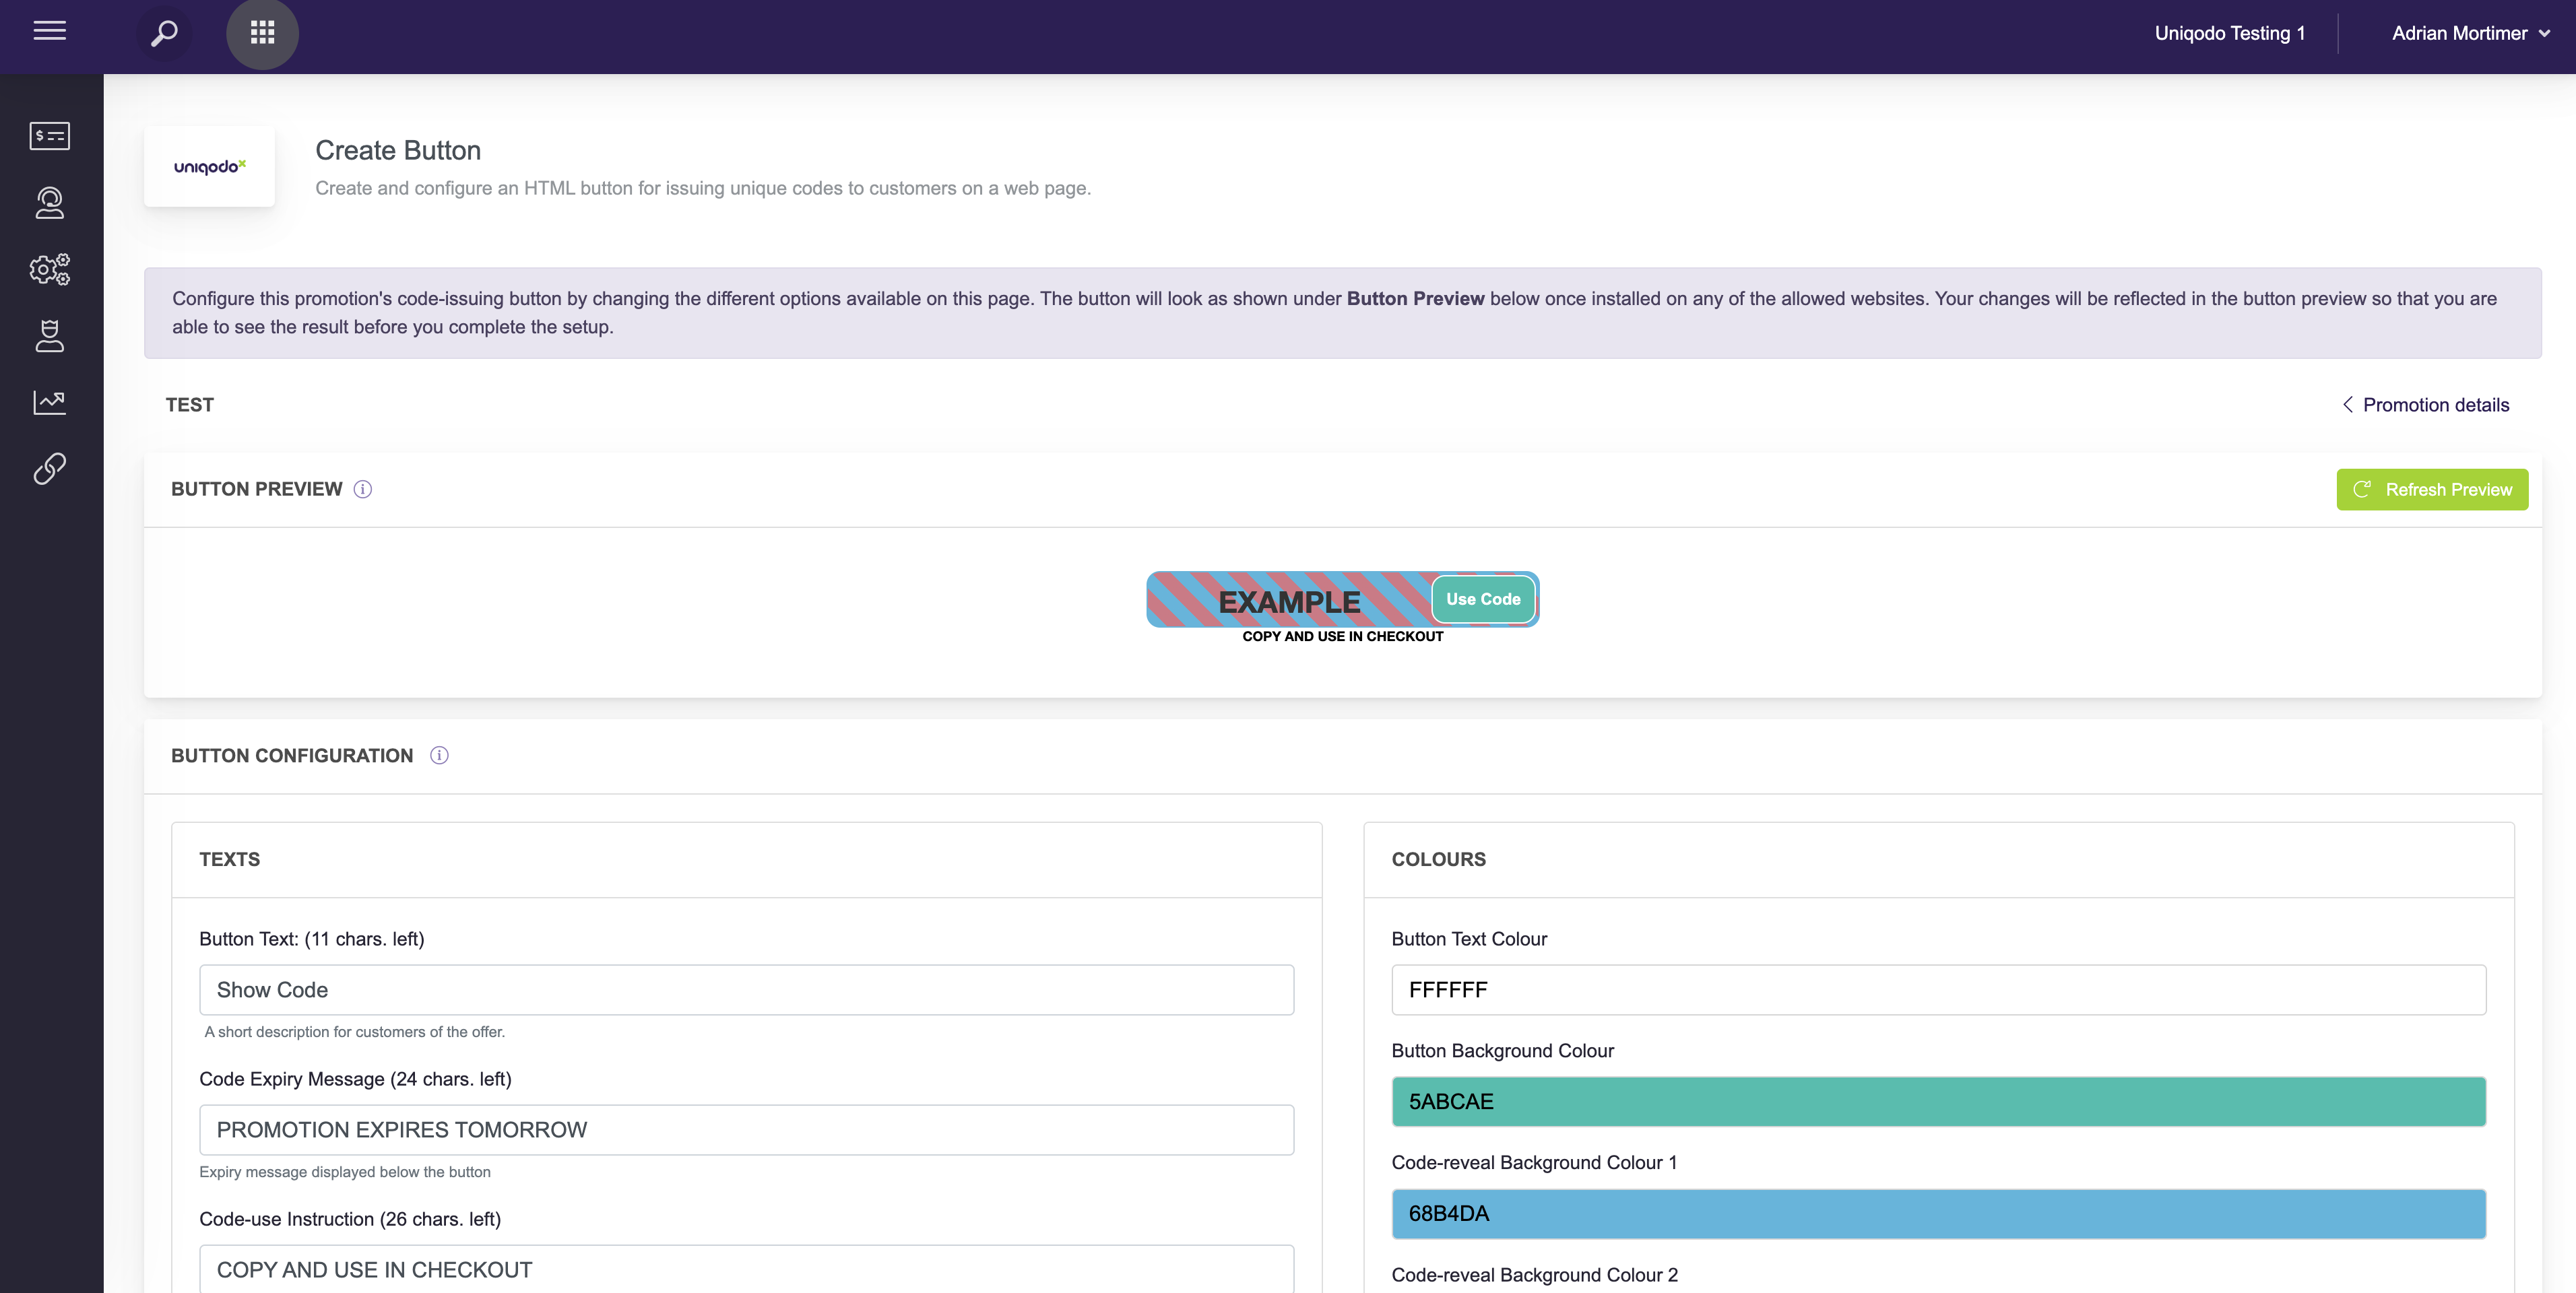
- Once you’ve successfully created the promotion, you'll be asked to design your HTML button. Here you can determine how the button should visually appear and what messaging should be presented within. These settings can be amended at any time, so not to worry if you don't have the exact colour codes handy.
On this step, you will also need to whitelist all domains (minimum 1) where the HTML button should be displayed. - After saving the button configuration, a confirmation email will be sent to the email address you entered in Step 2. This email will contain the HTML element which you’ll need to implement on the relevant webpage or blog post where the code button will be housed. The HTML snippet will also be shown in the distribution settings (Step 2) and is accessible here anytime thereafter.
- The HTML Button feature is now ready to be used. Please see here for more information on how to implement this on any given webpage.
If the container where the button element added is not long enough for the iframe this can cause display issues. This should be tested and previewed for all viewports (desktop, tablet, mobile etc).